
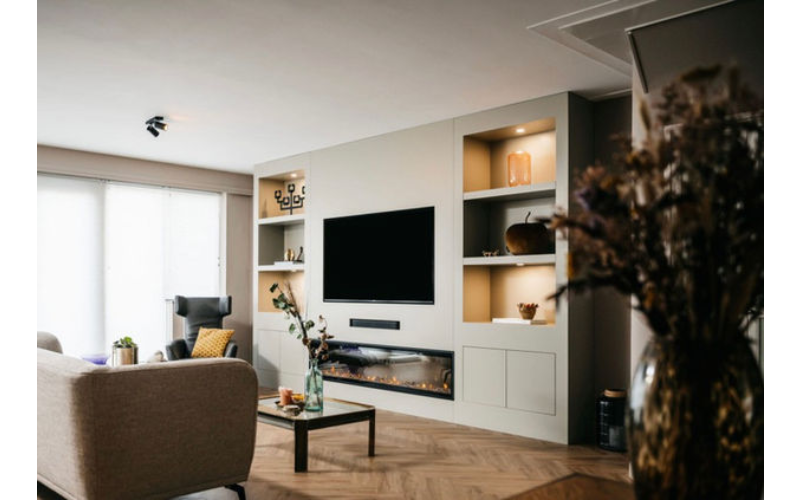
Media wall installation is transforming how we design and enjoy our living spaces. As the focal point of modern home entertainment setups, a well-designed media wall offers not only a sleek and organized look but also a highly functional space that enhances the overall viewing experience. From mounting flat-screen TVs to integrating sound systems, lighting, and storage solutions, a media wall can be tailored to fit any style or need. Whether you’re an avid movie watcher, a sports enthusiast, or someone who enjoys streaming their favorite shows, a media wall brings all your media elements together in one cohesive and aesthetically pleasing arrangement. This guide explores various aspects of media wall installation, providing insights and tips to help you create the perfect entertainment space in your home.
How To Prepare Your Space For Media Wall Installation?
Proper preparation is crucial for a successful media wall installation. Start by assessing the room where you plan to install the media wall. Consider factors like wall dimensions, viewing distance, and the natural lighting of the space. It’s essential to choose a wall that offers a clear line of sight from your primary seating area and is free from obstructions. Next, gather the necessary measurements and create a layout plan, ensuring that all components, such as the TV, speakers, and storage units, will fit seamlessly. Check the wall’s structural integrity to support the weight of the TV and other equipment. If you’re dealing with a drywall surface, it might be necessary to reinforce it with wooden studs or a mounting bracket. Additionally, plan the cable management system to keep wires hidden and organized, maintaining a clean and clutter-free appearance. Before beginning the installation, ensure you have all the required tools and materials, including mounts, screws, anchors, and power tools. Preparing your space thoroughly will ensure a smooth and efficient installation process, resulting in a functional and aesthetically pleasing media wall.
Top Tools And Equipment For Media Wall Installation
Having the right tools and equipment is essential for a successful media wall installation. Start with a high-quality TV mount that suits the size and weight of your television. There are various types of mounts, such as fixed, tilting, and full-motion, each offering different levels of flexibility and viewing angles. A stud finder is crucial for locating the wall studs, ensuring a secure and stable mount. A level is necessary to ensure that the TV and other components are installed straight and evenly. You’ll also need a power drill with various drill bits for making holes and securing screws. Cable management kits, including cable covers, clips, and ties, are important for organizing and concealing wires. Other useful tools include a measuring tape, screwdriver set, hammer, and wall anchors. For more advanced installations involving built-in lighting or sound systems, you might need additional tools like a wire stripper, electrical tape, and fish tape for running wires through walls. Having all these tools and equipment on hand before starting the installation will help you work efficiently and achieve a professional-looking media wall.
Media Wall Installation For Small Spaces
Creating a media wall in a small space requires careful planning and creativity to maximize functionality and maintain a sense of openness. Start by choosing a compact TV and a slim wall mount that keeps the TV close to the wall. Consider mounting the TV higher up on the wall to free up floor space and improve visibility from different parts of the room. Incorporate multi-functional furniture, such as a media console with built-in storage, to keep the area organized. Floating shelves are a great addition for displaying decorative items or housing media components without taking up valuable floor space. Opt for wireless speakers to reduce cable clutter and maintain a clean look. If space allows, integrate built-in lighting to highlight the media wall and create a cozy ambiance. Mirrors or reflective surfaces can also be strategically placed to give the illusion of a larger space. By thoughtfully designing your media wall and utilizing space-saving solutions, you can create an inviting and functional entertainment area even in the smallest of rooms.
Maximizing Functionality With Media Wall Installation
A well-designed media wall not only enhances the visual appeal of your living space but also maximizes functionality by integrating various entertainment and storage solutions. Start by selecting a TV mount that offers flexibility in viewing angles, such as a full-motion mount, allowing you to adjust the screen to suit different seating positions. Incorporate built-in shelving or cabinets around the TV to house media components, gaming consoles, and other accessories, keeping them organized and easily accessible. Consider adding a soundbar or surround sound system to enhance audio quality, and place them strategically for optimal sound distribution. Integrate smart home devices, such as voice-activated assistants or universal remotes, to simplify the control of your entertainment system. LED lighting strips can be installed behind the TV or along the shelves to create a dynamic and immersive viewing experience. Additionally, think about incorporating hidden compartments or cable management systems to keep wires and cords out of sight. By combining these elements, you can create a media wall that not only looks great but also offers a seamless and enjoyable entertainment experience.
Understanding The Basics Of Media Wall Installation
Understanding the basics of media wall installation is essential for achieving a professional and functional setup. Start with selecting the right location, ensuring the wall can support the weight of the TV and other components. Measure and mark the desired height for the TV, taking into account the optimal viewing distance and angle. Use a stud finder to locate wall studs and mark their positions. Attach the TV mount to the wall, ensuring it is level and securely fastened to the studs. Mount the TV onto the bracket and adjust as needed. Plan the placement of other components, such as speakers, shelves, and consoles, ensuring they are easily accessible and do not obstruct the view. Install cable management solutions to keep wires organized and concealed. Test all connections and components to ensure everything is working correctly. By following these basic steps, you can achieve a clean and professional media wall installation that enhances your entertainment experience.
Conclusion
Media wall installation is an excellent way to create a dedicated entertainment space that combines functionality with aesthetic appeal. Whether you have a large living room or a small apartment, a well-designed media wall can enhance your viewing experience and keep your space organized. By preparing your space thoroughly, using the right tools and equipment, and understanding the basics of installation, you can achieve a professional and seamless setup. Remember to consider the specific needs of your space, such as incorporating storage solutions and cable management systems, to maximize functionality. With thoughtful planning and execution, your media wall can become the centerpiece of your home, providing endless hours of entertainment and enjoyment.